
You’ve just updated your homepage copy, published a new blog post, or changed your logo. You open a browser tab, refresh the page, and nothing. The old version is still sitting there. Sound familiar? The culprit is almost always your WordPress cache, and clearing it is usually a two-minute fix. This guide walks you through exactly how to clear cache on WordPress, covering every layer of cache that might be involved, so you can stop second-guessing and get your site showing the right content straightaway.
What Is WordPress Cache and Why Does It Exist?
WordPress cache is a system that stores temporary copies of your website’s pages and files so they can be delivered to visitors faster. Rather than rebuilding each page from scratch every single time someone visits, the server serves a pre-built, saved version instead. This cuts load times dramatically, reduces pressure on your server, and gives your visitors a faster experience overall.
It’s genuinely useful. Page speed is a confirmed ranking factor for Google, and studies consistently show that slower sites lose visitors before they’ve read a word. Caching is one of the most effective ways to improve performance without touching a single line of code.
The downside? When you make changes to your site, the cache doesn’t always know about them straight away. It just keeps serving the version it saved earlier. That’s why clearing your cache is a routine part of managing any WordPress website.

The Different Types of WordPress Cache You Need to Know About
One of the most common mistakes people make is clearing one type of cache and wondering why their changes still aren’t showing. That’s because there are actually several distinct caching layers involved in how your site loads. Here’s what each one does.
Browser Cache
Your browser saves copies of website files, including images, stylesheets, and scripts, on your local device. This means when you revisit a site, those files load from your computer rather than being downloaded again. It’s what causes your own browser to show you an outdated version of your site even after you’ve cleared the server cache. It’s stored on your machine, not your server.
WordPress Plugin Cache
Caching plugins like WP Rocket, W3 Total Cache, WP Super Cache, and LiteSpeed Cache create static HTML versions of your pages and store them on your server. When a visitor arrives, they get the pre-built version rather than waiting for WordPress to generate the page dynamically. This is the most common type of cache on a self-hosted WordPress site, and it’s usually what people mean when they say “WordPress cache.”
Server-Level Cache (Hosting Cache)
Many managed WordPress hosts, including popular providers like Kinsta, WP Engine, and SiteGround, have their own server-level caching built in. This operates independently of any plugin you have installed. It tends to have the biggest performance impact and sits closer to the infrastructure layer, which means you often need to clear it separately through your hosting dashboard.
CDN Cache
If your site uses a Content Delivery Network (CDN) like Cloudflare, your content is copied and stored across a global network of servers. Visitors are then served content from the server closest to them geographically. CDN caches can hold onto old versions of files even after you’ve cleared everything else, so if you use a CDN, it’s worth checking that too.
Object Cache
WordPress also uses an object cache to store the results of database queries. This is usually less relevant for everyday content updates, but it matters if you’re making structural changes to your site or troubleshooting performance issues.
How to Clear WordPress Cache: Step by Step
Now the practical part. Below are the most common methods for clearing WordPress cache, starting with the quickest and working through to the less frequent ones.
Method 1: Clear Cache Using WP Rocket
WP Rocket is one of the most widely used caching plugins on WordPress, and clearing the cache is straightforward. Once you’re logged into your WordPress dashboard, look for the WP Rocket tab in the admin bar at the top of the screen. Hover over it and you’ll see a “Clear Cache” option in the dropdown. Click it, and the plugin will purge all cached files across the site. You can also go to Settings > WP Rocket and use the “Clear Cache” button from the main dashboard tab if you prefer. WP Rocket also lets you clear the cache for individual pages and posts, which is handy if you’ve only updated one piece of content and don’t want to rebuild the entire site cache.
Method 2: Clear Cache Using W3 Total Cache
W3 Total Cache is a powerful (if slightly more complex) plugin that covers multiple cache types in one place. To clear everything at once, find the “Performance” menu item in your WordPress admin bar, hover over it, and click “Purge All Caches.” Alternatively, navigate to Performance > Dashboard inside the plugin settings and use the “Purge All Caches” button there. W3 Total Cache manages page cache, object cache, and database cache separately, so using “purge all” ensures everything gets cleared in one go.
Method 3: Clear Cache Using WP Super Cache
WP Super Cache is a free plugin developed by Automattic, the company behind WordPress itself. Go to Settings > WP Super Cache inside your WordPress dashboard and click the “Easy” tab. You’ll find a “Delete Cache” button under the “Delete Cached Pages” section. Click it and the plugin will remove all stored static files. If you’ve enabled the admin bar option in the plugin settings, you may also see a shortcut directly in the toolbar at the top of the screen.
Method 4: Clear Cache Using LiteSpeed Cache
LiteSpeed Cache is particularly effective when your hosting server runs LiteSpeed Web Server software. When you’re logged in, look for the LiteSpeed Cache icon (a diamond shape) in your admin toolbar. Clicking it brings up purge options. You can purge all cached content, or selectively clear specific types. Alternatively, go to LiteSpeed Cache > Dashboard from the left-hand WordPress menu to access the same controls. If your host uses LiteSpeed servers, this plugin tends to give you better results than a generic caching plugin.
Method 5: Clear Cache Through Your Hosting Panel
If your host provides managed WordPress caching, you’ll usually find a cache-clearing option inside your hosting dashboard rather than (or as well as) inside WordPress itself. The exact location varies by host, but common examples include:
- Kinsta: Go to your MyKinsta dashboard, find your site, and click “Clear Cache” under the Tools section.
- WP Engine: Inside your WordPress admin, look for the WP Engine menu in the admin bar and select “Caching,” then click “Clear All Caches.”
- SiteGround: You’ll find cache controls in your SiteGround dashboard under Speed > Caching, or via the SG Optimiser plugin if it’s installed.
- Bluehost: Look for Performance > Settings in the admin toolbar, then click “Clear Everything.”
If your host isn’t listed above, check their support documentation or get in touch with their team directly. Most managed WordPress hosts have a simple one-click clear option somewhere.
Method 6: Clear Your Browser Cache
Even after you’ve cleared your server-side and plugin cache, you might still see the old version of your site. That’s because the files are cached locally in your browser. Here’s how to force a fresh load across the most common browsers.
Quick method (any browser): Hold down Ctrl and press F5 on Windows, or hold Cmd and Shift then press R on a Mac. This triggers a hard refresh, forcing your browser to re-download all assets for the current page without clearing your full browser history.
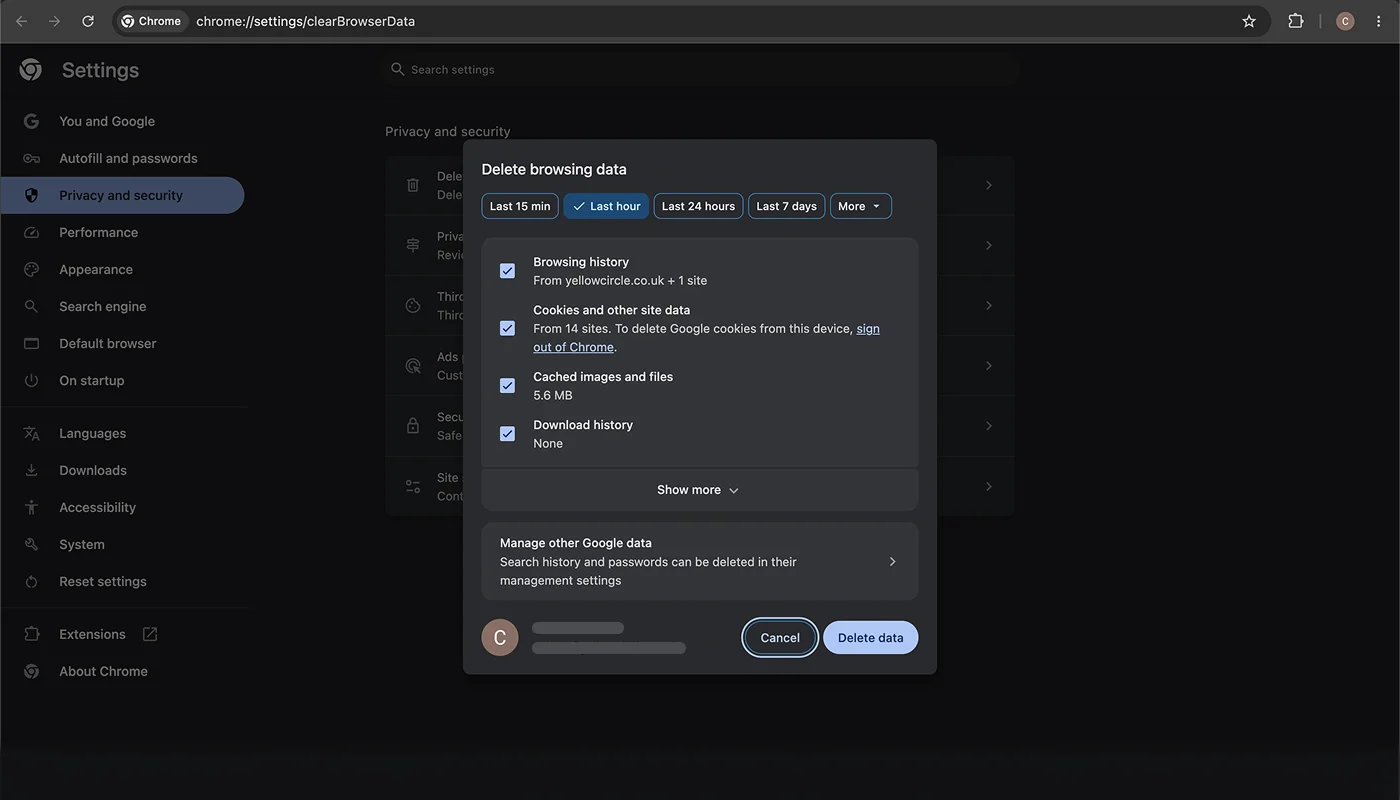
Chrome: Click the three dots in the top-right corner > Clear browsing data. Under the “Cached images and files” option, tick the box and click “Clear data.”
Firefox: Click the three horizontal lines in the top-right, go to Settings > Privacy and Security. Scroll to Cookies and Site Data and click “Clear Data,” then tick “Cached Web Content.”
Safari (Mac): Go to Safari > Preferences > Advanced and enable the Develop menu. Then click Develop > Empty Caches.
Edge: Click the three dots in the top-right, go to Settings > Privacy, search, and services. Under “Clear browsing data,” click “Choose what to clear” and tick “Cached images and files.”
Method 7: Clear CDN Cache (Cloudflare)
If your site is running through Cloudflare, your assets are cached on their global network independently of your server. To clear this, log into your Cloudflare account, select the relevant domain, go to the Caching section, and click “Purge Everything.” You can also purge specific files or URLs if you want to be more selective. Keep in mind that Cloudflare’s cache can take a few minutes to fully propagate after clearing, so don’t panic if you don’t see the change immediately.
Method 8: Clear Cache Without a Plugin (Via FTP)
If you don’t have a caching plugin installed and your host doesn’t provide a built-in option, you can manually delete cached files via FTP. Connect to your site using an FTP client like FileZilla, navigate to wp-content/cache/, and delete the contents of that folder. Be careful to delete only the files inside the cache folder, not the folder itself. This method is less common on modern managed hosting setups, but it’s useful to know if you’re on a more basic hosting plan.

When Should You Clear Your WordPress Cache?
Clearing the cache every day isn’t necessary. Most well-configured caching plugins will automatically purge relevant cache when you publish or update content, which means you won’t always need to do it manually. That said, there are specific situations where a manual cache clear is the right call.
- After updating page content, copy, or images and not seeing the changes on the front end
- After installing, updating, or removing a plugin or theme
- After changing your site’s design, colour scheme, or typography
- After running WordPress core updates
- When troubleshooting a display issue, broken layout, or missing element
- After migrating your site to a new host or domain
- After making changes to your .htaccess file or server configuration
A good rule of thumb: if something looks wrong or an update isn’t showing, clearing the cache is always the first thing to try. It takes seconds, it’s completely safe, and it fixes the issue more often than you’d expect.

Will Clearing WordPress Cache Affect My Website or Delete My Content?
No. Clearing your cache is a non-destructive action. It removes temporary, stored copies of your site’s files, not the files themselves. Your posts, pages, images, settings, and plugin configurations are all stored in your database and on your server separately from the cache. Deleting the cache simply tells your site to generate fresh copies of those files the next time someone visits. Your content won’t be affected in any way.
The only thing you might notice immediately after clearing the cache is that your site loads slightly slower for the first few visitors. That’s normal. The cache rebuilds itself automatically as pages are requested, and performance returns to normal quickly.
My Cache Is Clear but Changes Still Aren’t Showing: What Next?
If you’ve cleared all the cache layers described above and the issue persists, there are a few other things worth checking.
- Check all cache layers: Make sure you’ve cleared plugin cache, server cache, browser cache, and CDN cache if applicable. It’s easy to clear one and miss another.
- Try a different browser or incognito mode: This rules out any locally cached data specific to your browser profile.
- Check your DNS cache: If you’ve recently moved your site or changed your domain settings, your local DNS cache might be serving an old IP address. On Windows, open Command Prompt and run ipconfig /flushdns. On Mac, open Terminal and run sudo dscacheutil -flushcache.
- Disable caching temporarily: Most caching plugins have an option to temporarily pause caching altogether. This can be helpful when you’re making a series of changes and want to see them in real time without constantly clearing the cache.
- Check for plugin conflicts: If a plugin update has caused a display issue, caching may be masking it. Deactivating plugins one at a time in a staging environment can help identify the cause.
If none of the above resolves the issue, it may be worth getting a developer to take a look. Sometimes what appears to be a caching problem is actually something deeper in your site’s configuration. At Yellow Circle, we handle exactly these kinds of issues as part of our WordPress website maintenance service and we’re always happy to take a look if something’s not behaving the way it should.
How Does Caching Fit Into Wider WordPress Performance?
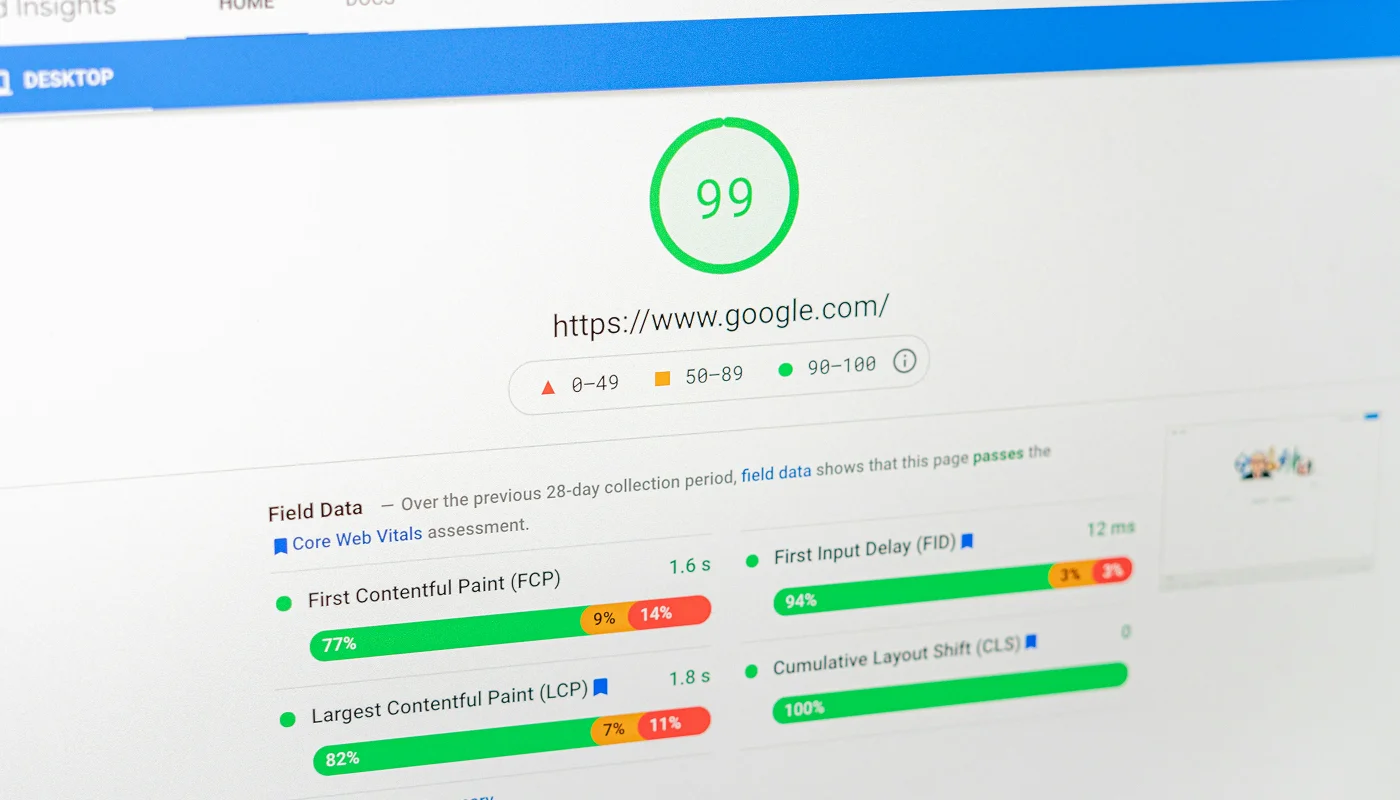
Clearing your cache is an important part of WordPress maintenance, but it’s just one piece of the performance puzzle. A well-maintained WordPress site also benefits from optimised images, minified CSS and JavaScript files, a reliable hosting environment, and a clean, lightweight codebase that doesn’t add unnecessary load.
If your site is running slow even after clearing the cache, the problem may be elsewhere. Common culprits include unoptimised images, poorly coded plugins, a bloated theme, or a shared hosting environment that isn’t well-suited to your site’s traffic levels. If you’re not sure where to start, a website audit can identify exactly what’s slowing things down and prioritise the fixes that will have the most impact.
At Yellow Circle, we build every WordPress site with performance in mind from the start. That means clean code, properly configured caching, optimised images, and strong Core Web Vitals scores as a baseline, not as an afterthought. If you’re considering a new build or wondering whether your existing site is as fast as it could be, take a look at our WordPress development service or our web design service to see how we approach it.
Frequently Asked Questions
How often should I clear my WordPress cache?
You don’t need to clear it on a fixed schedule. Most caching plugins handle this automatically when you publish or update content. Clear it manually when you notice changes aren’t showing, after a plugin or theme update, or when you’re troubleshooting a display issue. For sites that update frequently, checking the cache settings in your plugin to ensure automatic purging is set up correctly is more effective than clearing manually every day.
Is it safe to clear WordPress cache?
Yes, completely. Clearing your cache only removes temporary copies of your site’s files. It doesn’t delete your content, change your settings, or affect your database. The only side effect is a brief slowdown while the cache rebuilds itself, which usually takes just a few minutes as visitors trigger fresh page loads.
Why does my WordPress site look broken after clearing cache?
This can happen if CSS or JavaScript files are minified and combined by your caching plugin, and the regenerated versions aren’t quite right. Try clearing your cache again, or check your plugin’s settings for options to “regenerate CSS” or “clear CSS/JS files.” If the issue persists, temporarily disabling the caching plugin is a good first diagnostic step. A plugin conflict can sometimes cause styling issues that appear after a cache clear.
Do I need a caching plugin on WordPress?
It depends on your hosting setup. If you’re on managed WordPress hosting with built-in server-level caching (such as Kinsta, WP Engine, or Flywheel), a separate caching plugin may not be necessary and could actually conflict with the host’s own system. Check your host’s documentation before installing one. If you’re on standard shared hosting or a basic VPS, a caching plugin like WP Rocket or LiteSpeed Cache is usually a good idea and will make a noticeable difference to your site speed.
What’s the difference between clearing cache and deleting cookies?
Cache refers to stored copies of website files (images, scripts, stylesheets, HTML) that help pages load faster. Cookies are small text files stored by websites on your device to remember information about you, such as login status or preferences. Clearing cache and clearing cookies are separate actions with different effects. Clearing cache won’t log you out of websites. Clearing cookies might. Most browser settings let you clear them independently, so you can clear cached files without affecting your login sessions.
Need Help Keeping Your WordPress Site Running Properly?
Clearing your cache is one of those tasks that sounds technical but is genuinely straightforward once you know where to look. If you’d rather hand the day-to-day management of your WordPress site over to a team who’ll keep it fast, secure, and up to date, that’s exactly what our website maintenance plans are designed to do. Get in touch and we’ll find the right level of support for your business.